How to shoot white objects on a white surface.
This post has been long overdue. Some of my friends have been asking me to do a post on high-key photography, especially white on white. It is about understanding your exposure and that is all there is to it. Once you get the hang of it, you will agree with me. This is the real reason for the procrastination - it’s really that simple.
Before I get into the ‘how-to’ of it, let me explain the technical details. First let us understand what we define as WHITE. If you walk into a paint store, you will probably see ‘50 shades of white’ (no pun intended), so what is white ? The dictionary defines white as of the color of milk or fresh snow, due to the reflection of most wavelengths of visible light; the opposite of black. How does photography define pure white ?
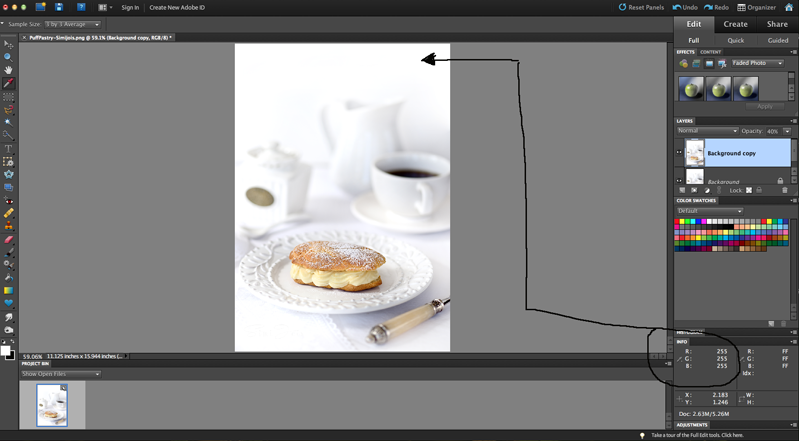
RGB stands for RED, GREEN and BLUE, that can be mixed together to create any color. When each hue of these three is set to zero - it is black. When the highest intensity of each color is mixed it is white. Technically, the number is 255, 255, 255 for RGB to create pure white. This color system is used in computer screens. You might wonder, why you need to know this, but stay with me. So when you see an image with seamless edges, melting into the screen and you wonder how the photographer achieved it - you know what it mean - it is pure white with RGB = 255, 255, 255. If you take the eye dropper tool in PS and measure the color value of the pixel, if it is pure white, it is going to read 255 for all three - as shown in the image below.
With me so far, now let us find out how we can achieve this.
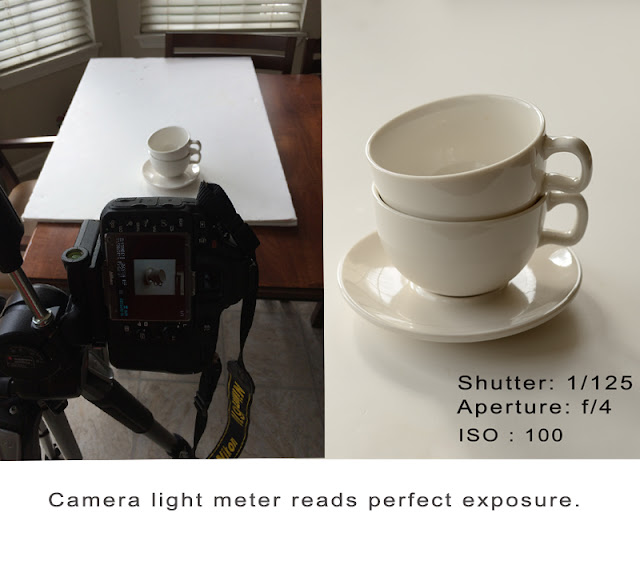
Now let us understand exposure. When you are photographing snow and you expose the image perfectly according to your camera light-meter. You will still notice a not so vibrant image. Probably even a tad bit of gray…why? If the exposure meter shows a perfect exposure, then why does the image look like it is underexposed.
This is how the light meter of the camera works - it always measures the reflected light. Not every color reflects the same amount of light. Now…white can reflect 90% of the light falling on the scene, while black may only reflect 5% of the light falling on the scene. How does the camera meter a scene having whites or black. Since the camera cannot “ know” what the subject is, all camera meters are calibrated to a standard “normal" setting.
This normal setting used to calibrate meters is sometimes called “18% Grey,” "Neutral Grey" or "Middle Grey". Most situation have a good mix of dark, light and middle toned areas, and metering system works fine. However, if the subject is brighter or darker than the “normal” (snow or dark black shade) the camera will still try to expose to make the image middle grey in tone. So a dark black color will be overexposed and look gray and white (snow) will look underexposed and gray.
So that is why, even when the exposure meter shows a perfect exposure - the image is underexposed in case of whites and overexposed in case of black - making it grayish in both cases.
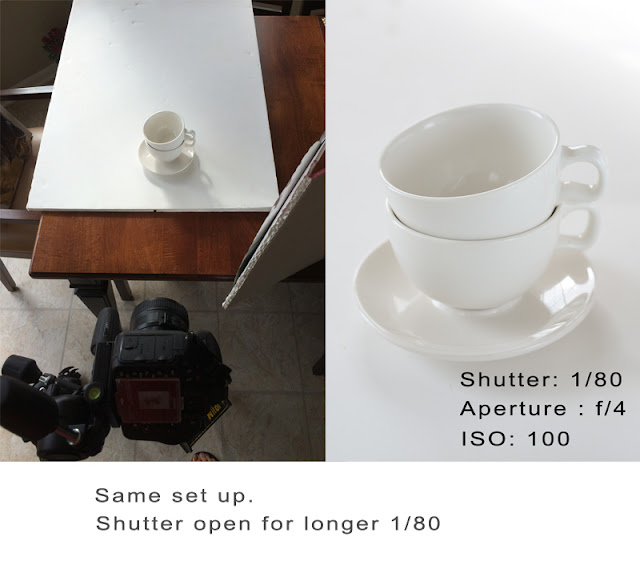
So one way of getting the perfect exposure is simply overexposing your image. Use the histogram to measure the correct exposure so that you do not have any clipped edges.
Always shoot in RAW, so you have more options when you edit.
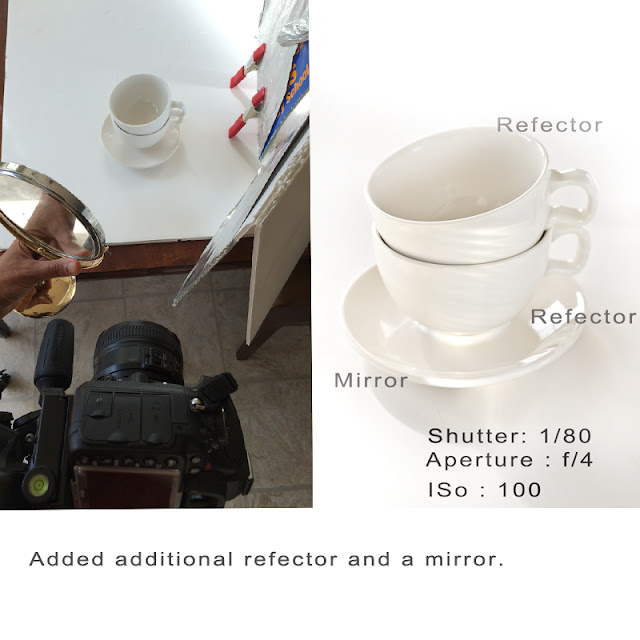
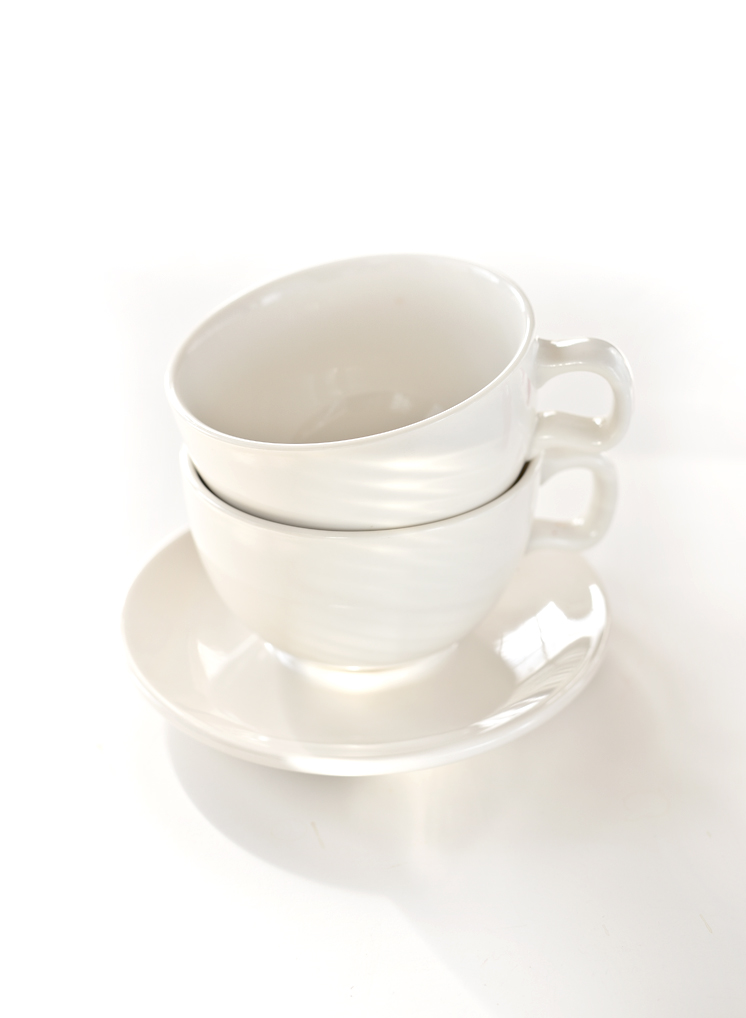
When I photograph a white bowl on a white surface I make sure every bit of the white background has good light on it, when using natural light, use reflectors, mirrors and every tool you have to fill light to the background. ‘Shoot’ we start ?
You need
white background - poster board
white prop - mugs, cups, plate
reflectors - poster board or for more light, wrap the poster board with aluminum foil
mirror
camera
My camera : Nikon D610, 50mm lens
A mug of coffee - so you sip, work and enjoy. I have used the manual mode, you can use Aperture-Priority mode and increase the exposure by increasing exposure compensation.
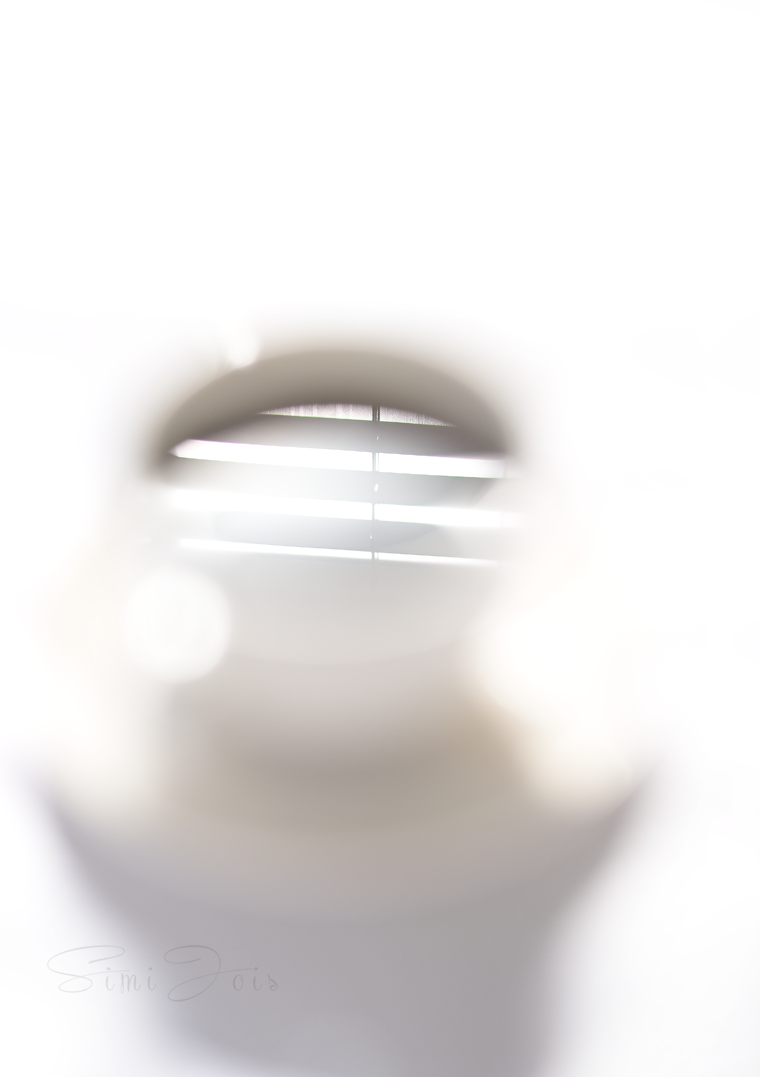
The images below are self explanatory
Final Image : Post edit includes adding light in levels and using dodge tool. Now was that rocket science ? Not really !! :) When one more tip about WB - scroll below.
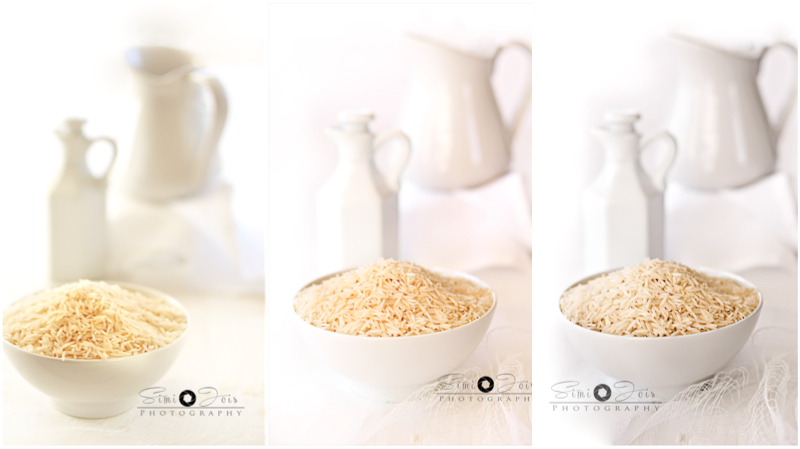
This is the last part and I promise. Now even if the whites look great, if the WB is off, it can break an image. Using custom WB for whites is preferable, but if not try with different settings. Remember WB can easily be corrected in post. Below is an image with three different white balance. Each has a different hue. It’s also your artistic expression, there is no right or wrong.
Hope this tutorial was useful. Do let me know what kind of tutorial you would like in the future. Have a wonderful weekend.









Thanks in HEAPS . Such a wonderful detailed post, every bit of it is a real value to budding photographers.And the best part is the simplicity you've achieved to make it simple and doable .. Thanks again. Will try to apply this knowledge and practice very soon.
ReplyDeleteSujatha, thanks for always supporting me !! Hope this helps.
DeleteI have just recently started paying attention to my food photos. So this post is just in time to get me started on the long road to learning! Thanks a bunch.
ReplyDeleteAnsh,
DeleteAm warning you - don't get addicted ;) let me know if you need help.
Thank you so much dear Simi for this wonderful tutorial, you have explained it so very well and make is sound so easy. Shooting white on white is always a challenge, with the help of your tutorial I will be able to shoot white on white now, Going to practice more now and will do it the right way this time.
ReplyDeleteThanks Jyothi - do share the outcome !!
DeleteWhat a post!! There are many white on white tutorial but yours is the best!! Love the purity and elegnace of white!!! Will check your post again and again for this !
ReplyDeleteYou have been asking me to do this for months - finally :) hope it was worth the wait.
DeleteVery very useful post Simi. Thank you for explaining so beautifully, you make it sound so easy. Will have practice a lot :-)
ReplyDeleteIt's not very hard - just a bit of practice :) thanks
DeleteGreat Post Simi...So helpful...Will surely try to work on it...
ReplyDeleteThanks !!
DeleteGreat post. My pics fail for WB. This shud help. Pls hv more WB tutorials if possible.
ReplyDeleteI'll do a detail one - here is one basic post referring to WB - http://www.turmericnspice.com/2014/03/365-days-of-photography-february-part2.html
DeleteVery well explained simi ...
ReplyDeleteThanks Shailaja
Deletethats an wonderful Post Simi. I always fail to click white on white. now it would be easier. thanks for sharing your experience
ReplyDeleteThanks a lot for such a helpful post.You have really explained it so well.
ReplyDeleteThanks !!
DeleteThis is an amazing tutorial, Simi! So clear and easy to understand. Thanks.
ReplyDeleteAlready have request for future tutorial :) Can you do one on steam?
Bina,
DeleteI already have, here is the post :http://www.turmericnspice.com/2014/03/365-days-of-photography-march-part1.html
Must have missed it. Thanks so much, Simi! Will check it out right now.
DeleteThank you again Simi for this wonderful and so useful post!
ReplyDeleteThanks Rekha :)
DeleteThis a wonderful post and you make it sound so easy. Thanks for the post.
ReplyDeleteTrust me it's easy :)
DeleteVery well explained. Thanks a lot for such an useful post. Keep inspiring us! :)
ReplyDeleteThanks so much for taking the time and saying it. Means a lot !
DeleteYou do know you are the best? Shoot I say it again? I've read it once and will he back several times. Technically challenged as I am, thisakes more sense to me than anything else. Takes me back to the first days of FPC. Thank you heaps. 💕💕💕
ReplyDeleteYou don't need my tutorial - what are you doing here? 😘😘
DeleteYou are a natural and someone who has inspired me soooo much - you have art in your soul Deeba!!
Thanks a ton for sharing this post. This is surely gonna help me improve my white on white photography.
ReplyDeleteLet me know if this helps.
DeleteThis is my first visit on your blog....... OMG this space is wonderful...... Well written post..... Thanx a loot for sharing.... :) injecting high dose of motivation to play with camera..... :)
ReplyDeleteThis is super cool. Go through the tutorial and I'm sure it'll help me to improve my photography skill. Thanks a ton.
ReplyDeleteSimi, you are the best!!! If I lived closer I would have taken private lessons from you. But for now I will use your tutorials as a guiding star. Thanks a heaps!!!
ReplyDeleteI saw everyone on fb posting white on white pictures. So some early to read your tutorial and I'm going to try this once my brat is off to sleep. Love your pictures and tutorials. Thanks!!!
ReplyDeleteLove your pictures, Simi Jois- some beautiful gazing. Thank you for the post. Playing with wb is the bane of my existence😔
ReplyDeleteSo interesting and helpful. Thank you. Inspired now
ReplyDeleteThis is so beautifully explained. Even I could understand it. Hope I can put in practice....
ReplyDeletevery helpful...will definitely try
ReplyDeleteWow awesome post Simi....n beatific pics as always... :)
ReplyDeleteWhat a well explained tutorial Simi,,, badly waiting for long weekend here to try this experiment
ReplyDeleteThank you so much Simi, for this inspirational post! This post of yours made me push my limits and do WonW ... Thank you!
ReplyDeleteHi Simi. ...Do you take photography classes. ...I am based in Delhi and a huge fan of your photography.
ReplyDeleteThank you Bobby. Unfortunately I do not do any lessons in photography for now, I have a section on the blog. Hope that helps :http://www.turmericnspice.com/search/label/Photography%20tutorials
DeleteHey Simi.. Thank you so much for this and many other tutorials that you have shared.
ReplyDeleteI tried to take a white on white photography with the help of this post and posted it on my instagram. If you find time then please have a look on the shot. Would really appreciate your feedback and suggestions would help me improve my photography..
Leaving a link here.. Whenever you find time please drop by..
https://www.instagram.com/p/BPrBUB6Ac4E/?taken-by=spicesandflavors&hl=en