 |
| 2017 |
This is unbelievable, on 2014 on April 4th, I posted a tutorial (this one) on painting boards. Three years after on the same day I opened up the post to edit and re-post with some fresh content. What is the possibility that I pick the exact same day after three years.... amazing right.
Before I start, the first image, the paint is still wet. The finished dry board is not as glossy.
Now, the way I am going to re-post this is, all new content will be in blue. All new pictures will have the caption - 2017. Before I forget, I will be doing an Instagram live demo of painting boards very soon - ( will announce here and on social) . Here is a link to my Instagram, if you want to follow updates.
Why Do we need to create different backgrounds for food/still photography ?
If you have to create food or still life photography and you use the exact same background in over hundred images..you may show consistency but another word could be boring. There are so many elements in food photography, when you are weaving a story around your photography, with board in my mind . Some of them are -
1 What food are we talking about ?
2 Props and colors of the props and boards?
3 Do the prop colors match the food and the board, is it complimentary or monochromatic?
4 Where do you place the props?
5 How much background do you show?
6 What kind of light? Back lit or side or front, does it effect what color I use?
7 Texture? Single color or dual color prop-board ?
8 Does color change mood ?
9 How do I know what colors go together?
10 What color boards can me used multiple times without making it boring ?
Ask yourself these questions. if you are planning to create an light and airy image and you are painting a board with a blue-black and a lot of textures, I guess .... you need to re-think your colors a bit. Take a look at your prop collection, kind of image you shoot and then pick your colors and prop texture.
Color Wheel
If picking colors do not come naturally to you, you can do one of two things. Go monochromatic, pick a color and use tonal variations to create layers, you can even use gradation in same color - image below.
OR...
Use 2-3 colors that are complimentary. More than 2-3 it becomes too many colors, of course there is always exceptions to the rule, where multi colors work very well.
OR
Go black or white. Paint it for texture.
 |
| Color gradation 2017 |
 |
| Color gradation 2017
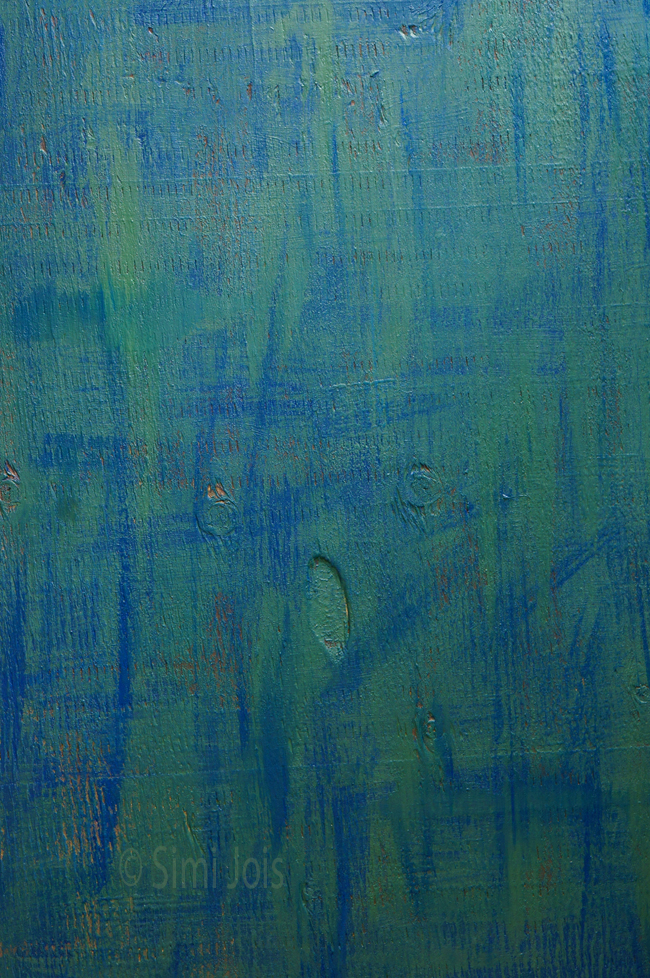
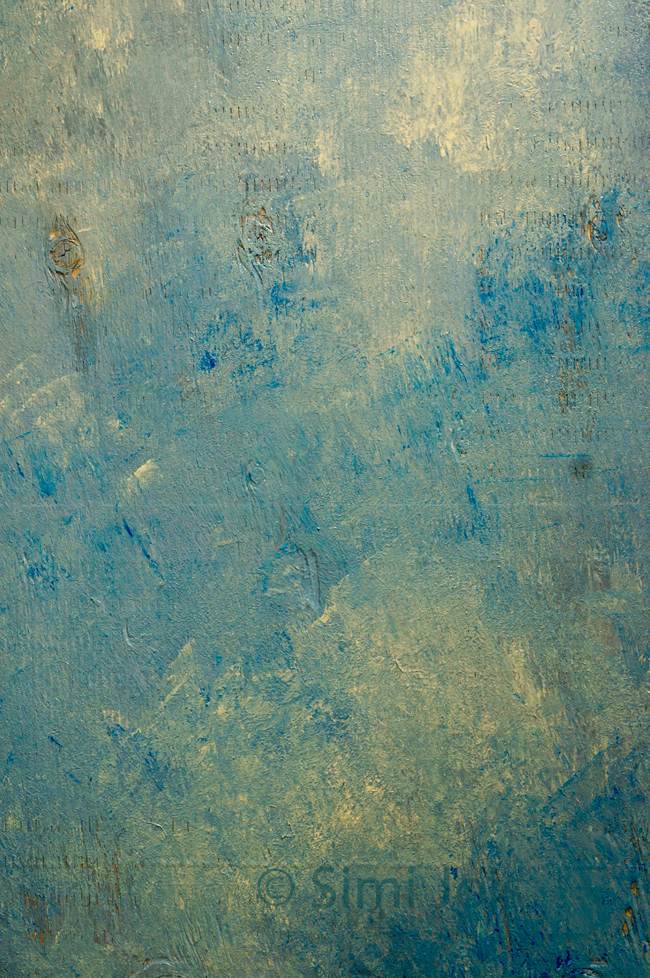
Different images and moods created with the board blue-green.
|
I must pat myself on the back, I promised you guys a blogpost on prop boards and here it is. After shooting 5 ingredients for a book (book here) and the cleaning up that goes with it ( which I almost despise) I am ready to take the rest of the day off. Am excited to share this post with you, so after I hit publish on this post, am going to put my feet up and relax. I just love painting boards ! I can pretend to be an artist…! I have always seen my mother work with oils, charcoal, graphite and even embroidery. My mother and sister are amazing artists, you can view my mother’s portfolio here. If you clicked on the link, and saw what you saw, you will know why I said …these boards seem lame right.
Thanks for all the queries and requests that prompted me to write this post… I hope I will be able to explain and if you have any questions, just let me know and I will try to answer them. I hope I inspire you to go and paint some boards and don’t forget to leave me a link or share a picture of your board.
I have used two techniques here. Dry brushing and wet on wet is what I usually use. If you are not good with picking colors use a color wheel and complimentary colors on the color wheel really work well together. Just play around, if you do not like it you can always repaint it.
Note : paints can dry darker or lighter then they appear when they are wet. So, if you are looking for a specific color and are picky make sure you take that into account. When you mix two colors, you get a third color that is a blend of the two, so if you are going with blue and yellow you will have a green there.
You can paint on both side of a board.
For solid colors I usually use foam board, as they are so much easy to carry.
Materials
ply wood or any kind of wood with some texture. Foam board if solid color.
Paint - I usually use interior home paint, get samples from the hardware store - it’s about 4-5$ for a sample. If you get lucky you might find something in clearance for as low as 50 cents. Specially gray, most times when a color is not mixed properly it is gray and you will find it in clearance.
Brush - again, I got one from the hardware store
Rag cloth - it really helps reduce the mess.
Method - Dry brush
Pick two colors. Clean the wood and paint the basic color on the ply wood, I usually paint the darker color first. Don’t have to be very precise. You can also do the light first as the base- it’s your board. The main color will be the second color.
Let it dry, preferably 2-3 hours.
After it is dry to touch, take a dry brush, and dip just the edges of the brush in the paint and with very quick movement brush large strokes on the dried plywood. Do not cover the whole area, we want the first coat of color to be visible. Make some strokes vertical and some horizontal so it does not look uniform. In the board above the blue color I have used is an acrylic color ( I had it at home). Remember acrylic is water proof so not a great paint for this purpose, but… since this is something I already had, why not. Will repaint this board if it gets ruined.
I did not like it that much as I found the strokes a bit harsh, that’s because it was acrylic. When the paint is still wet, dab with rag cloth, it will subdue the harsh lines from the stroke. If the paint has dried, add a bit more paint on the same spot and dab with rag. You can use either colors to dab.
When you pick your colors and make the boards, remember the board is not the main hero, it's a prop for the photographs and you do not want it to grab all the attention.
The above board is one of my favorites and have been used multiple times. See, how it is used below. I painted it with dark brown and turquoise and paired it with a brown plate…ties it all together. Click here for more images of this board.
Method - Wet on wet
Pick two or more colors, keep all the paint jars open. Pick one main color, start painting like you normally would. Keep changing colors every now and then. To blend the colors, dab the brush horizontal on the board or use a rag cloth, do it when the paint is wet. You can add new color, paint over, this is your canvas, enjoy ! It's really fun and addictive.
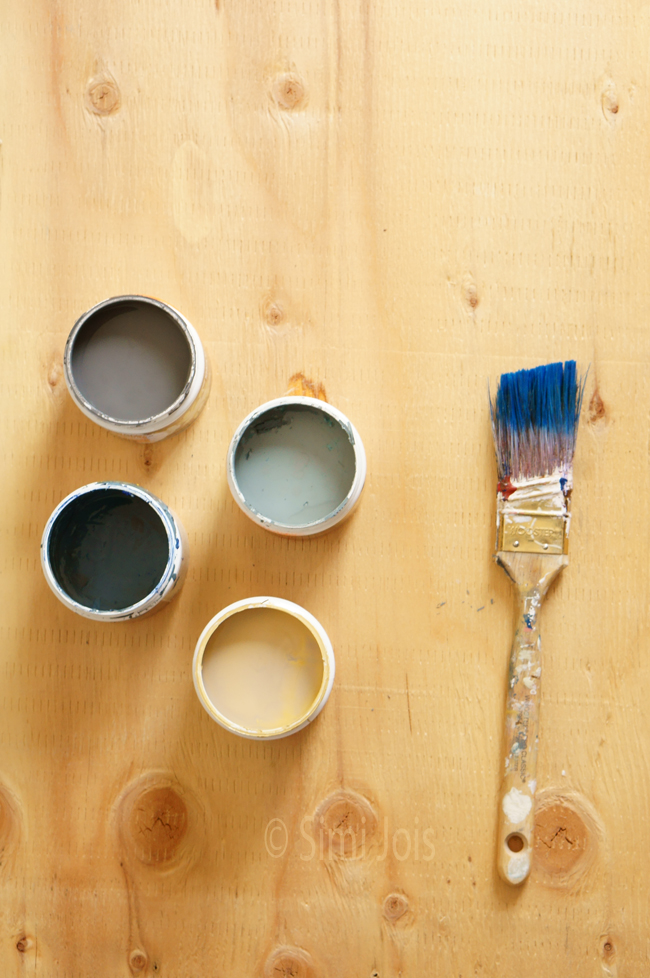
I used 5 colors.
Dark gray
light gray
creamy yellow
bluish turquoise
dark blue ( acrylic)
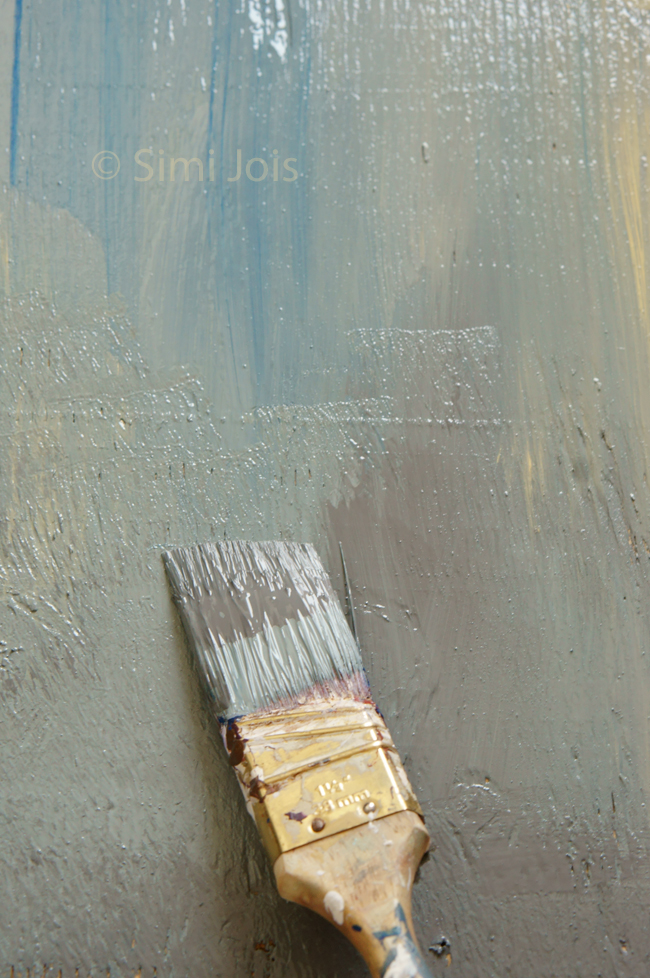
After the first coat, I felt the lines and strokes looked too forced, so started brushing it horizontally with another coat.
Kept mixing and redoing the horizontal strokes till I found what I liked. Added more blue and yellow and reduced the grays.
The final look ! It will dry a bit darker, when I use it, will try and tag this post.
Hope i was successful in doing a meaningful post and hope you guys have a wonderful weekend.
Adding textures to the wet and wet
1- Paint the board with the main color and let it dry completely, now add the second quote a different color. Take a steel-wool ( yes the same one that you use to scrub the burnt pan), and after the paint is somewhat dry but not completely, scrape the paint. in order to create textures. Don't over do it, as too many textures don't work that well with photography.
2 -If steel wool is not the texture you are looking for, let the second coat of paint dry completely and take a sand paper and remove the top quote in a distressed way
3- This is really easy and my favorite method. Paint primary color, let it dry. Now take white Elmers glue, add water, somewhat painting consistency and paint on it ... just when it is about to dry ( not completely dry), apply the second color. This method has to be done in SMALL sections, as the glue dries you get a nice picture. Image below is done with this technique. I used white as the first color and turquoise as the second color.
 |
| 2017 - using glue |
How to distress natural wood
This is a slow process and needs time. There is no way I know how to advance this process. I left the wood outside for two years to weather. It was absolutely worth all the time, I treasure it like gold. Below is the raw version.
 |
| Natural wood - 2017 |
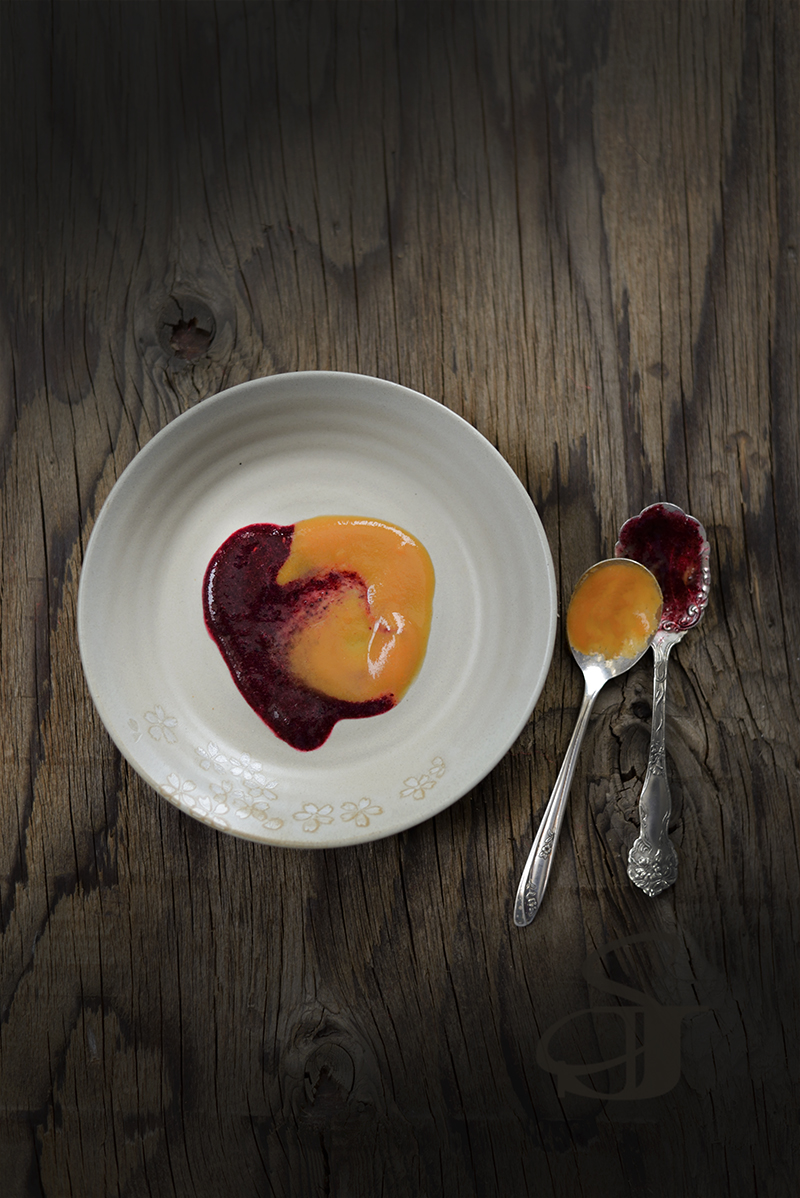 |
| varnish distress wood - 2017 |
Super easy, you can do with wet-wet method or dry brush method... the colors just blend like butter. Make sure to use a thick paper for this, as the paper loves to buckle with water.







Inspiring post as always, Simi. Thanks!
ReplyDeleteThanks Lexi
DeleteSaw the post as jerry shared in the photo group. Love you technic of paining th eboard, i am so going to try this when i have a bit of time.
ReplyDeleteBeuatiful boards Simi!!!! Got to add more to my collection after seeing this :)
ReplyDeletelooks great. I hope to make some like this soon.
ReplyDeleteI love painting boards, only not long ago I got into conclusion I actually don't need real food and ply wood is perfect. I often find it in a dumpster. I actually have really similar turquoise board. I overuse it, but the colour is beautiful http://magdascauldron.com/2014/03/apple-muffins.html
ReplyDeleteMagda,
Deleteme too I overuse my turquoise.
Nice to see a detailed article on painting prop boards. I was wondering whether you got the wood also from a hardware store ?
ReplyDeleteYes Avika from Home Depot
DeleteVery helpful post Simi. I bought couple of boards and paints last month but havent had a chance to paint them yet. I will follow your tips and see how they are going to turn out. Will keep you posted.
ReplyDeleteBTW your mom's art is absolutely terrific. Regards to her and thanks again for the post.
Thanks Pavani,
DeleteYes mom is super talented, if I may say so myself. Thanks so much for your kind words.
excellent post simi..loved each and bit of it..inspired me enough to work on the boards!
ReplyDeleteUseful post Simi dear and am inspired with ur work.keep going with useful posts dear.am waiting this for only since u post about this in FB.
ReplyDeletethanks Ramya!
DeleteGreat post--I cannot wait to try this! Any tips for making a board with just one color, but with some of the wood showing through so it looks sort of rustic, like the backdrop in your nutella macarons post? Or did you use two colors for that? I'm thinking maybe I could get a distressed effect by painting a board and then sanding it in spots...
ReplyDeleteRebecca,
DeleteJust use the dry brush method and make sure you leave some part of the wood unpainted. That is what I did for the Macaron board.
Simi, very nice post..you have a wonderful collection..I did few prop boards too and there's some more boards left..thanks for the post...
ReplyDeleteHi Simi, thanks for this inspirational post.
ReplyDeleteThis is such a useful post Simi :) thank you for sharing
ReplyDeleteWhy did I miss this? I spent all morning trying to paint a wooden chopping board, and now I see this. Truely inspiring Simi...well done!
ReplyDeletethanks Deeba, can’t wait to see your boards
DeleteThanks for sharing, Simi. It's very helpful!
ReplyDeleteYour boards are very beautiful Simi ... Thanks for sharing the tips
ReplyDeleteThanks Shema ;)
DeleteGreat post Simi...wonderfully explained ! After seeing the turquoise board on food group... i was so tempted to have similar color and texture that I ended up buying a turquoise colored cloth for the bkground ... will try to clck a photo with it and post on blog soon ...Regards to ur mom,,,she is too talented !
ReplyDeleteThanks Aparna, will pass it on to my mother. :)
DeleteBtw can't wait to see your turquoise cloth in a photograph.
DeleteI was planning to come here and read it in peace. What a lovely useful post. Kudos for all the good work Simi.
ReplyDeleteOmg, fantastic post, i need to paint some of my boards, now u r motivating me.
ReplyDeleteThanks for sharing some useful tips ! I love painting boards but most of the time I did not get the color what I wanted, :( Now I am going to try the new one, following you! :)
ReplyDeleteWhat a treat to eyes in the morning...
ReplyDeleteI have been painting boards all this week flipping sides with poster colors.....
I had the curiosity on background props and I never found an answer... So I just did..what occurred to me...
I m inspired to paint more!
Cheers
Thanks for such a useful post Simi. I stumbled over here from a link and happy I did as your photography is gorgeous. This post was very timely as I was just looking at one of my boards thinking I need to improve it somehow. Thanks again!
ReplyDeleteAn extremely useful post; thanks for the share Simi. I am just getting into boards and this has been very helpful.
ReplyDeleteYay! This is just what I was looking for! Thanks Simi, so glad to have found you through the food styling Group.
ReplyDeleteI hope it helps :) Let me know the results.
DeleteThanks Simi for such a useful post..since i have just started and this will sure help me a lot. I must say, your images are beautifully captured.
ReplyDeleteCool Post Simi! Bookmarking it! Will definitely try it out soon!
ReplyDeleteBeautiful boards Simi! I have one question though. You have mentioned foam boards in the post but I want to clear if I can use the dollar store foam boards and texture them. Thanks. :)
ReplyDeleteI have used ply wood. You can use foam board too, you will have to use a sponge or rag cloth for texture.
DeleteThanks for this very informative post Simi. I really like the colour of the second board from top. Should I look for "bluish turquoise" in the store?
ReplyDeleteThanks for the tutorial simi. Currently I am using black,white and blue boards. Will use this tutorial to paint some more.
ReplyDeleteBeautiful and inspiring post Simi, this is so useful for a photographer and you have an eye for all the asthectics..that turquoise board takes my heart away...I donot whether I can reach up to your perfection, but definitely will help me in understanding color a lot.
ReplyDeleteOne question though Simi..do you get the samplers with gloss or flat ??
ReplyDeleteRM, sorry for the late response - you can use either gloss or flat. I prefer flat as I do not have to deal with reflections. Having said that, I have used gloss too…it's just a different effect.
DeleteThanks much Simi
ReplyDeleteGreat post ....!!! really inspiring and helpful for me..... thanx...... :)
ReplyDelete